Commuter e-bike setup starts long before you touch an Allen key. It starts with two numbers you should cross-shop before you ever look at a price tag, and those numbers are voltage and wattage. I have watched a lot of people in Denver buy the wrong bike first and then spend a season trying to set it up into something it was never going to be.
I rode a fixie 40 miles a day as a messenger in this city for eight years, up and down the hill streets the tourists never find. My knees quit before the bike did, and the compromise was a motor. Now I commute on an e-bike daily, ride dirt on weekends with my 14-year-old son, and weigh just under 200 pounds. That last number matters more than anything else in this article. A bike set up for a 150-pound rider and a bike set up for a 200-pound rider are not the same bike, even when they are the same model.
So here is the order I actually do it in. Pick the bike by voltage and wattage first, assemble it properly in your garage, then spend an hour on fit and setup before you ever ride it hard. Get that sequence right and you are not shopping again in six months.
Why you should trust me
I have assembled and tuned every bike I have owned in my own garage, starting with a solo build I finished in two hours flat. I am the test nobody else runs: almost 200 pounds, real hills, real weather, all four seasons. When I say a bike holds up, it means it survived being dropped, ridden hard, and ridden again the next morning. My son has dropped his bike four times and it is still going.
I also track range obsessively, photograph the battery meter at the end of every ride, and cross-shop by 52V versus 60V before I look at a price tag. That habit is the reason this article puts the motor spec ahead of the price.
What I will not do is pretend I have lived with either of the two bikes below for a full season. I have not. What I can tell you is how I read their spec sheets, what I would check first if one showed up in my garage, and how I would set either one up for a heavier rider. That is the honest version, and it is more useful than a fake long-term report.
How I picked and how I tested
I picked from a short list of e-bikes for adults that share three traits: a battery you can actually read the specs on, a motor rated in both nominal and peak watts, and a frame geometry that does not assume a 140-pound rider. Those are the same three filters I apply to anything with a motor and two wheels.
Here is what I looked at, in order. First, the electrical platform. A 48V system with a 500W nominal motor and a 1500W peak is the honest entry point. A 2500W peak motor paired with a 1040Wh battery is a different class of machine entirely, and the battery capacity in watt-hours is the number that tells you how much range headroom you actually bought. Voltage and watt-hours first, price second. Always.
Second, the mechanicals. Wheel size, tire width, brake type, and whether the frame has mounts for a rack and fenders. On a commuter, a rack beats a lighter frame every single time.
Third, the setup burden. How much of the bike arrives assembled, what tools are in the box, and whether the display lets you adjust wheel size and speed settings without a dealer. If you cannot put it together in your garage, you do not really own it.
I did not run either of these bikes through a timed hill climb, because I do not have either one in my garage yet. I did compare them the way I compare everything: on the specs that survive contact with a real rider on a real hill.
The two bikes I would start from
Both of these are adult e-bikes with a real battery and a real motor, and they sit at two very different points on the price ladder. One is a first commuter. One is a bike you buy when you already know you are going to ride it every day.
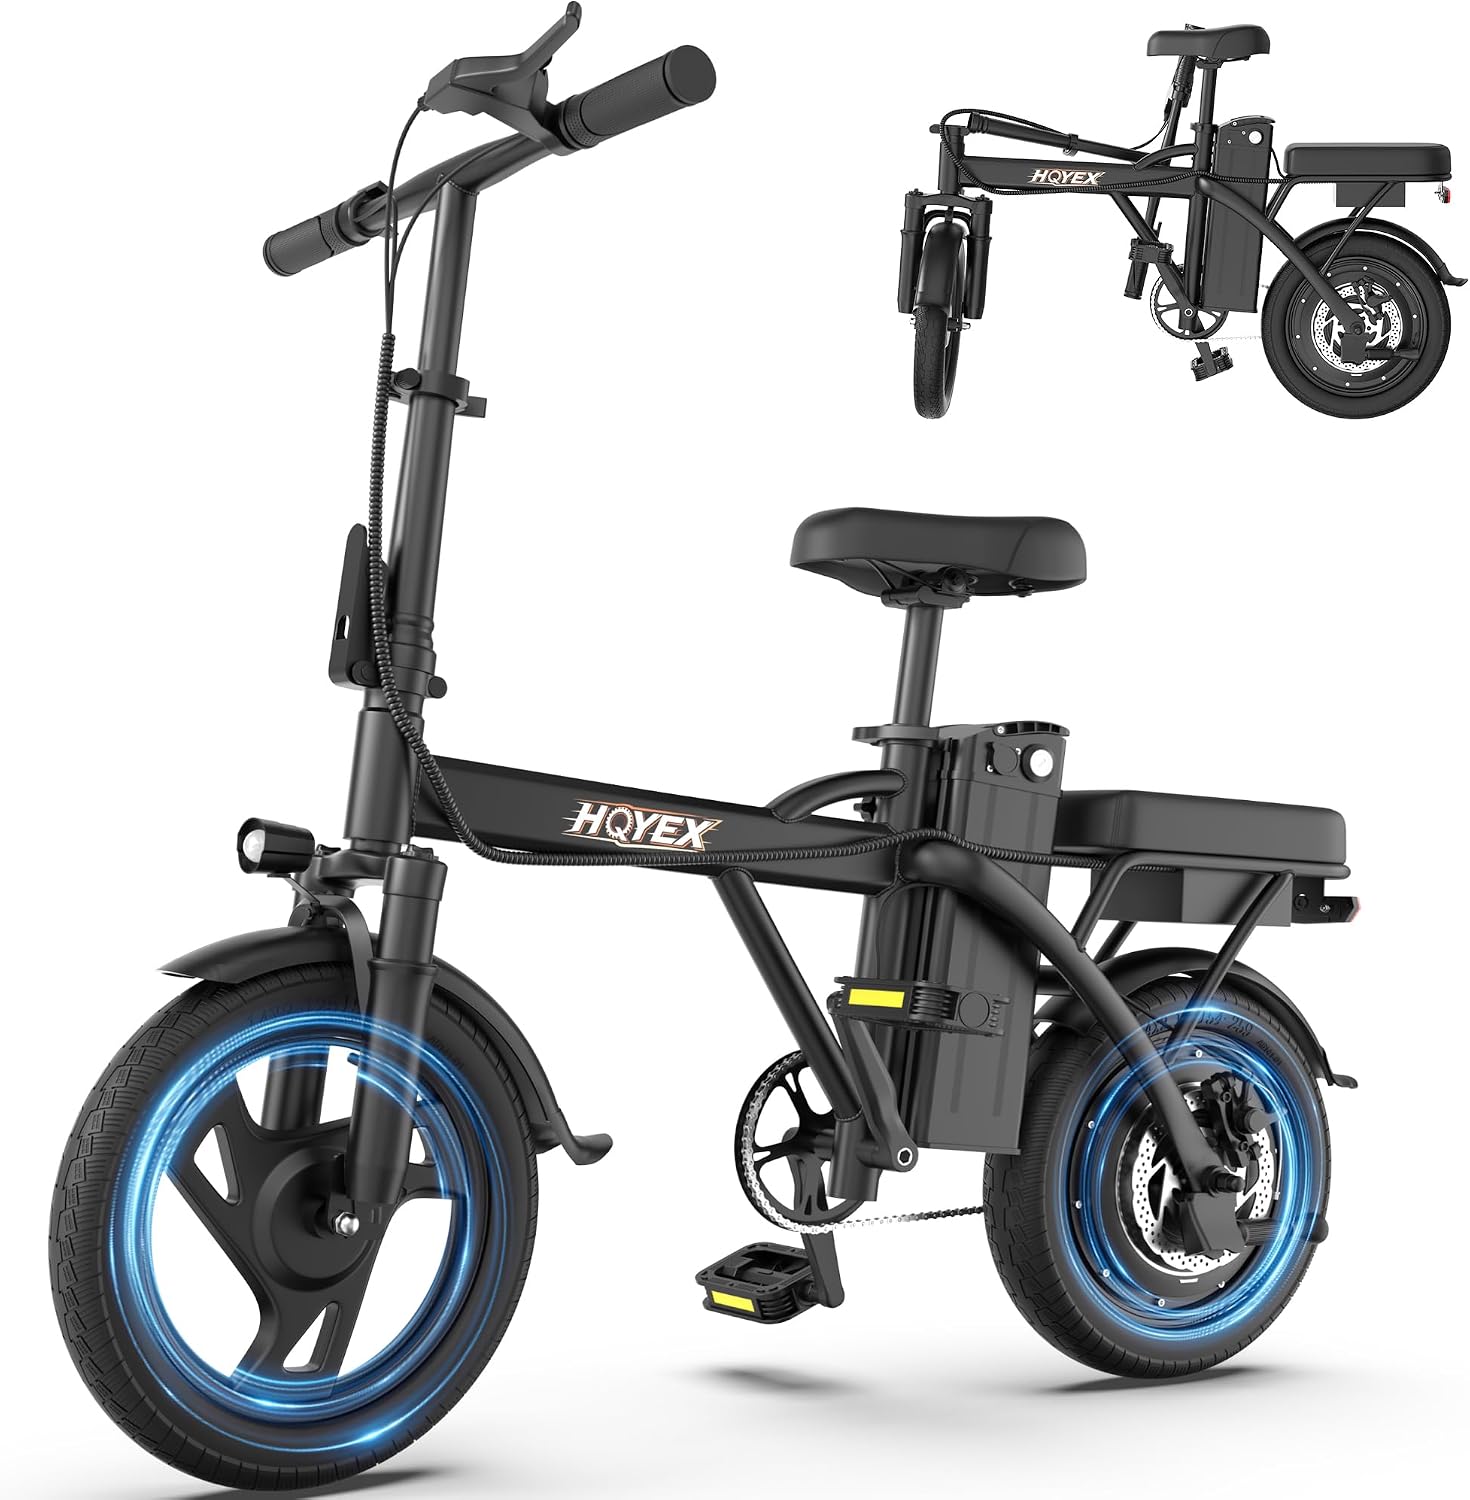
Budget pick: Electric Bike for Adults 14"/20"/26" Ebike 48V 500W/ 1500W
 Visit on Amazon →
This is the one I would point a first-time commuter at. The platform is 48V with a 500W nominal motor and a 1500W peak, which is the configuration I trust for daily riding because it is proven, parts are everywhere, and it does not pretend to be a dirt bike. Check current Amazon price.
The interesting thing here is the wheel choice. The same bike is offered in 14, 20, and 26 inch versions, and that decision changes the ride more than any other single option on the page. The 14 inch version is a compact machine: it accelerates quickly, it turns tight, and it stores in a closet or a car trunk without a fight. The tradeoff is that small wheels transmit every crack in the pavement straight up through the bars, which is exactly the thing that rattles your teeth on a route with bad asphalt.
The 26 inch version is the one I would pick for a real commute. Bigger wheels roll over potholes and curb transitions with less drama, they hold speed better, and the geometry puts you in a more natural position for a 10-mile ride. If your commute is mostly smooth bike path and you need to carry the bike up stairs at either end, the 20 inch version is the compromise, and it is a reasonable one.
Because the 48V system is the entry tier, budget for a couple of upgrades in your first month: a set of fenders if you ride in weather, and a rack if you carry anything at all. Those two additions do more for a commuter than any drivetrain upgrade.
Flaws but not dealbreakers: A 1500W peak motor on a 48V pack is a burst figure, not a sustained one. Expect the bike to pull hard off the line and then settle into a steady cruise. That is normal and it is fine for commuting. Just do not buy it expecting to hold peak power up a long grade.
Anyone who wants a first e-bike that fits a tight apartment, a modest budget, and a daily route under 10 miles should look here first.
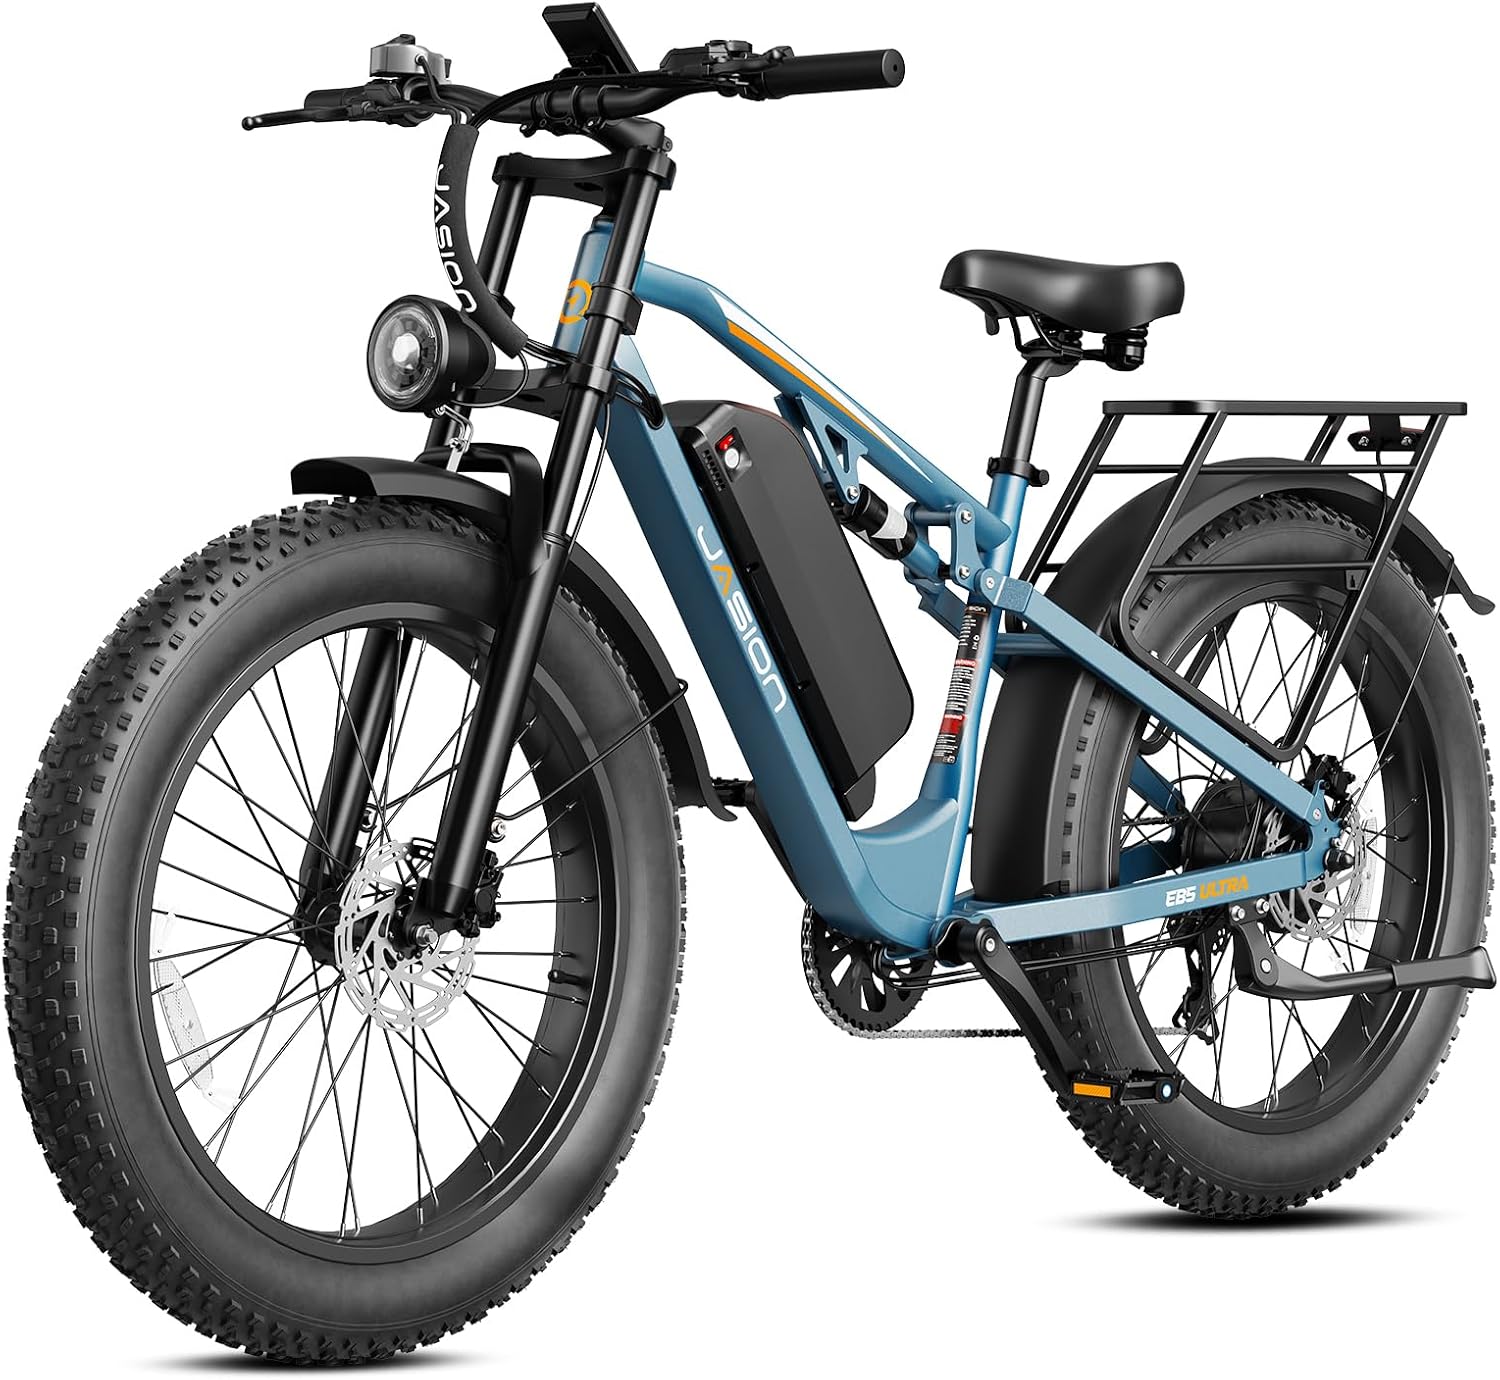
Upgrade pick: Jasion EB5 Ultra Electric Bike for Adults 2500W Peak Motor, 1040Wh Battery
 Visit on Amazon →
The Jasion EB5 Ultra is a step up in a way you can measure. A 2500W peak motor and a 1040Wh battery are not marketing adjectives, they are the two numbers that decide whether a bike has power for days or runs out of breath on the third hill. Check current Amazon price.
The 1040Wh figure is the one I care about most. Watt-hours are the honest way to compare batteries across bikes, because they combine voltage and amp-hours into a single number that tells you how much energy is actually in the pack. A bigger pack means you can run a higher assist level without watching the meter, and it means the bike still pulls when the battery is at 40 percent instead of only when it is fresh off the charger.
A 2500W peak motor on a heavier rider is the difference between a bike that climbs because you are pedaling and a bike that climbs because the motor is doing the work. At almost 200 pounds, that is the spec I would pay for. If you are commuting 15 miles each way, carrying groceries, or riding a route with a real climb in it, this is the bike that will still feel strong in month six.
The catch with a bike in this class is weight. More battery and a bigger motor mean more mass, and that matters when you are lifting it onto a rack or carrying it up a flight of stairs. Measure your storage situation before you order.
Flaws but not dealbreakers: This is more bike than a casual weekend rider needs. If your entire route is flat and under five miles, you are paying for capacity you will never touch. That is not a flaw in the bike, it is a mismatch in the buyer.
Anyone who has already decided that an e-bike is going to replace car trips, not supplement them, should start here.
The setup workflow, step by step
This is the part that separates a bike you love from a bike you tolerate. Do it in this order.
Step one: inventory before assembly. Unbox in the garage, not the living room. Lay out every part and match it against the packing list. Count the hardware. If something is missing, you want to know now, not halfway through with the front wheel in your hand. Minor surface scratches from shipping happen and are understandable. A missing brake caliper bolt is a different problem.
Step two: assemble in the right order. Handlebars and stem first, then the front wheel, then pedals, then accessories. Thread every bolt by hand before you put a tool on it. Cross-threading a stem bolt on a new bike is the single most avoidable mistake in this entire process.
Step three: torque everything, including the stuff that came pre-installed. The factory tightens bolts for shipping, not for riding. Go over the stem, the seat post clamp, the axle nuts, the brake caliper mounts, and the crank arms with a torque wrench. This is the step everyone skips and the step that keeps the bike from feeling loose and vague on the first ride.
Step four: charge the battery fully before the first ride. Not 80 percent. Full. You want a known baseline so that every range observation after this one means something.
Step five: set tire pressure for your actual weight. This is where heavier riders lose the most performance and never realize it. Factory pressure is set for a lighter rider on smooth ground. At almost 200 pounds, you want to be at the higher end of the tire's range for pavement, and slightly lower if your route is rough. Too soft and you will feel every bump and lose range. Too hard and you will skid on wet pavement.
Step six: fit the bike to your body. Saddle height first: with the pedal at the bottom of the stroke, your knee should be almost straight, not locked. Then reach. If you are stretched out or bunched up, change the stem or slide the saddle, not your posture. Then lever angles. Brake levers should be reachable with two fingers without moving your hand off the grip.
Step seven: bed the brakes. Find a quiet stretch of pavement, get up to a moderate speed, and brake firmly to a near stop about ten times in a row. This transfers an even layer of pad material onto the rotor and it is the difference between brakes that grab and brakes that howl.
Step eight: verify the display settings. Check that the wheel size in the display matches the wheel on the bike. If it does not, your speed reading is wrong and so is your odometer. This is also where you learn what the assist levels actually do, so you are not surprised by mode 3 in traffic.
Step nine: ride it short, then ride it hard. First ride, stay close to home for 15 minutes. Second ride, take it up the biggest hill on your normal route. If something is going to loosen, slip, or rattle, that hill will find it.
Fit is where cheap bikes get expensive
Here is the thing I tell everyone who asks me about their first e-bike. Suspension and fit are where budget bikes cheat, and fit is the one you cannot upgrade your way out of.
If the frame is too small, you will feel it in your wrists and your lower back on every ride over 30 minutes. If the saddle is wrong for your body, no amount of tuning will fix it. If the reach is too long, you will unconsciously put all your weight on your hands and wonder why your arms go numb at mile six.
So before you spend money on a second battery or a faster controller, spend it on a saddle that fits and a stem that puts the bars where your shoulders want them. That is the tune that actually makes a bike faster over a commute, because it is the one that makes you want to ride it tomorrow.
What this all costs
The budget 48V bike and the Jasion EB5 Ultra sit at two different points on the ladder, and the difference in price buys you battery capacity and motor headroom, not just a badge. Add a rack, fenders, a decent lock, and a saddle that fits, and you have the real cost of a commuter setup.
Spread over a year of daily commuting, the math stops being about the bike and starts being about what you are not spending on gas, parking, and wear on a car. That is the calculation that actually justifies the upgrade tier, and it is the one most people run backwards, buying the cheap bike first and then buying the good one eight months later.
Do the setup once, do it properly, and the bike you already own will feel better than a more expensive bike that was never fit to you.
That is the job. A bike is only as good as what survives, and what survives starts with how you built it.